このご時世、「お店や施設の混雑状況が分かると嬉しいですね。でもプライバシーにも配慮しないとね。」というAIカメラ製品・ソリューションがいろいろと出てきていますね。今回はそれをOpenVINOで無料でやってみようという試みです。
実際に使う場合はいろいろと考慮する点がありますが、やっつけ的に実装していますので何かとご容赦ください。
実行結果
まずは実行結果からご覧ください。
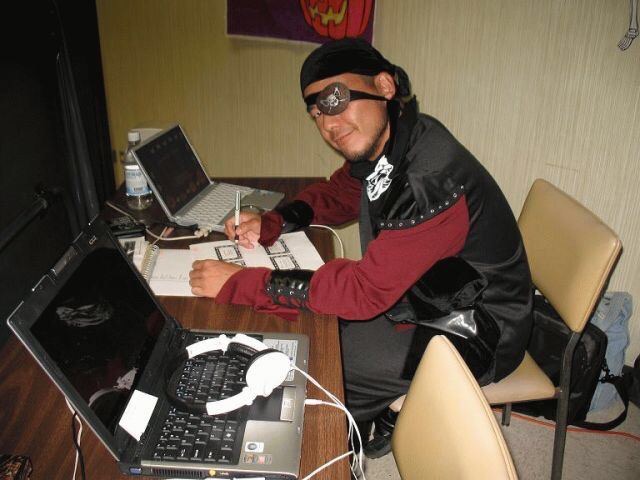
使用した動画
face-demographics-walking.mp4 を使いました。
実行結果と比較するとわかりますが、無事、誰かわからないようになっていますね。
考え方
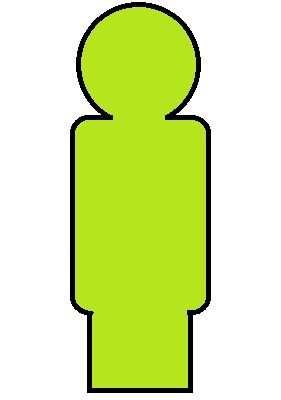
OpenVINOで人検出(person-detection)を行い、検出した人の位置を利用して、静止画に置き換えるという流れになります。
参考までに、検出した人の上に静止画を載っけると、以下のような状態になります。位置をそのまま利用していることがわかりますね。
検出したエリアをモザイク処理するという事でも良いですが、記号化することでよりプライバシーに配慮している。ということになるのでしょうか。
使用した部品など
”OpenVINOを簡単に扱えるラッパー”をyas-simさんが公開されていますので、今回はそちらを利用させて頂きました。ありがとうございます!
また、マスク処理について、様々なページを参考にさせて頂きました。ありがとうございます!
全体のフォルダ構成

intelフォルダ配下には、モデル(person-detection-retail-0013)を格納しています。
ソース・使用画像
さて、ようやく本題のプログラムになります。繰り返しになりますが、やっつけ的な部分があります。動作検証ということでご理解ください。
image_compose.py
## fncImgCompose(front_img, back_img, size, pos)
##
## front_image ... charactor
## back_image  ... background
## size        ... size of charactor(x,y)
## pos         ... position of charactor(x,y)

import cv2
import numpy as np

def fncMakeMask(figure):

    # HSV に変換する。
    hsv = cv2.cvtColor(figure, cv2.COLOR_BGR2HSV)

    # 2値化する。
    bin_img = cv2.inRange(hsv, (0, 10, 0), (255, 255, 255))

    # 輪郭抽出する。
    contours, _ = cv2.findContours(bin_img, cv2.RETR_EXTERNAL, cv2.CHAIN_APPROX_SIMPLE)

    # 面積が最大の輪郭を取得する
    contour = max(contours, key=lambda x: cv2.contourArea(x))

    # マスク画像を作成する。
    mask = np.zeros_like(bin_img)
    cv2.drawContours(mask, [contour], -1, color=255, thickness=-1)

    return mask


def fncImgCompose(front_img, back_img, size, pos):

    # front_image ... charactor
    # back_image  ... background
    # size  ... size of charactor(x,y)
    # pos   ... position of charactor(x,y)

    front_img = cv2.resize(front_img,size)
    mask = fncMakeMask(front_img)

    x, y = pos

    # 幅、高さは前景画像と背景画像の共通部分をとる
    w = min(front_img.shape[1], back_img.shape[1] - x)
    h = min(front_img.shape[0], back_img.shape[0] - y)

    # 合成する領域
    fg_roi = front_img[:h, :w]               # 前景画像のうち、合成する領域
    bg_roi = back_img[y : y + h, x : x + w]  # 背景画像のうち、合成する領域

    # 合成する。
    bg_roi[:] = np.where(mask[:h, :w, np.newaxis] == 0, bg_roi, fg_roi)

    return back_img
person_detection_async.py
import iewrap

import time

import cv2
import numpy as np
import image_compose as img_cmp

imgBuf = {}

def callback(infId, output):
    global imgBuf,im_back

    output = output.reshape((200,7))
    img = imgBuf.pop(infId)
    img_h, img_w, _ = img.shape

    im_figure = cv2.imread(r'rsc/figure_standing.jpg')

    for obj in output:
        imgid, clsid, confidence, x1, y1, x2, y2 = obj
        if confidence>0.5:              # Draw a bounding box and label when confidence>0.8
            x1 = int(x1 * img_w)
            y1 = int(y1 * img_h)
            x2 = int(x2 * img_w)
            y2 = int(y2 * img_h)

            #cv2.rectangle(im_back, (x1, y1), (x2, y2), (255,0,0), thickness=4 ) #blue

            im_back = img_cmp.fncImgCompose(im_figure, im_back, (x2-x1,y2-y1),(x1,y1))

    cv2.imshow('result',im_back)
    cv2.waitKey(1)


def main():
    global imgBuf,im_back

    cap = cv2.VideoCapture(r'.\rsc\mov\face-demographics-walking.mp4')

    ie = iewrap.ieWrapper(r'.\intel\person-detection-retail-0013\FP16\person-detection-retail-0013.xml', 'CPU', 10)
    ie.setCallback(callback)

    while True:
        ret, img = cap.read()
        if ret==False:
            break

        img = cv2.resize(img,(1600,900))
        im_back = cv2.imread(r'rsc/background.png')

        refId = ie.asyncInfer(img)     # Inference
        imgBuf[refId]=img

if __name__ == '__main__':
    main()
画像

実行結果
上記プログラムを実行すると、以下の結果が得られます。OpenVINOを使って人の位置を検出するという部分までは本当にお手軽に確認出来るので、あとは画像の料理次第ですね!ぜひお試しください。
ご参考
今回の環境はこちらです。渋谷の交差点のライブカメラなどではさすがに処理が増えてしまいますが、普段使いの場合は問題は無いと思います。
- Windows 10 home (20H2)
- Intel(R) Core(TM) i5-7260U CPU @ 2.20GHz
- メモリ 4GB
- OpenVINO 2021.1
- person-detection-retail-0013\FP16\person-detection-retail-0013
フリーのITエンジニア(何でも屋さん)。趣味は渓流釣り、サッカー観戦、インラインホッケー、アイスホッケー、RaspberryPiを使った工作など。AI活用に興味があり試行錯誤中です。